Hi Readers, In this article we are going to learn how to create Virtual machine using Azure portal and Powershell console, as a first step we need to create resource group. so lets see what is resource group first.
Resource group
Resource group is a primary layer of your azure environment, where you can provision, managing assets like VM, Virtual network, storage, etc. a resource group can be used to scope access control of administrative actions and every resource should have a resource group.
Create Resource group using azure portal
Step 2: select resource group from your left navigation
Step 3: Click Add button and select your subscription and provide resource group name and select region

Step 4: click next to tags, it’s just an optional. You can provide value or ignore it
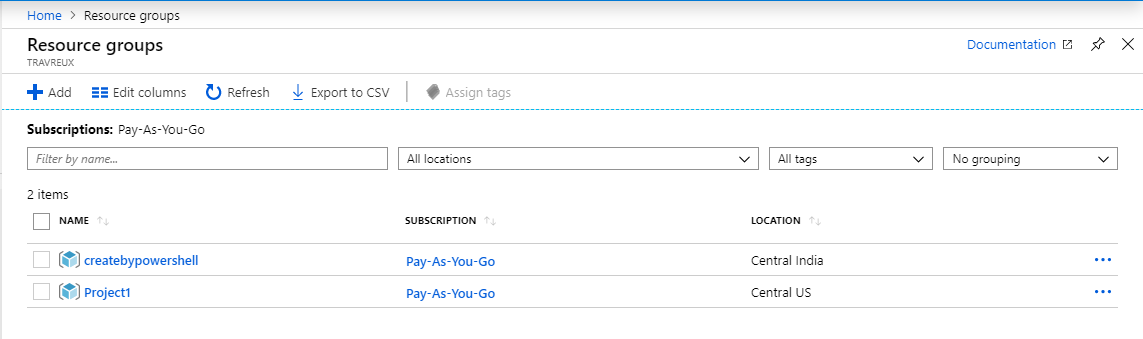
Step 5: finally click create from bottom and it will take few moments to create resource group at back-end

Create resource group using PowerShell
Before that we need to install azure PowerShell modules in your local machine, to install module run the following command in PowerShell
Install-Module -Name az
Once the module gets installed successfully, then connect to your azure tenant using below command
Connect-AzureRmAccount
After connected to your tenant, run below command to create resource group
New-AzureRmResourceGroup -Name "createbypowershell" -Location 'Central India'
Create Virtual machine using Azure Portal
Step 1: click virtual machine from left navigation
Step 2: click add and provide VM name, Image and specification on next screen

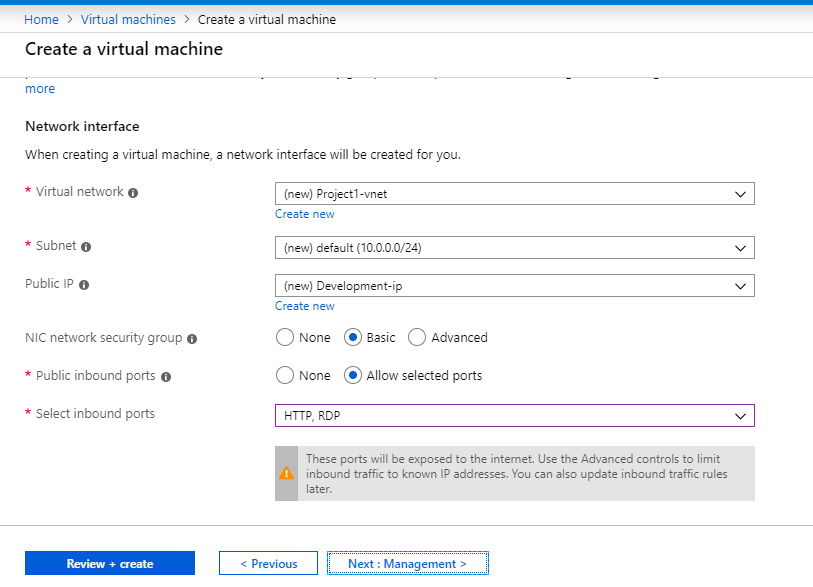
Step 3: Provide Administrator name and password and enable inbound port for HTTP(80) and RDP(3389) and click next from bottom

Step 4: you can select OS Disk type. You have option called Standard HDD, Standard SSD and Premium SSD. I am selecting premium SSD for better performance and click next

Step 5: For every resource azure will automatically create network IP and subnet by own, in this article I am going with default network IP and subnet
Step 6: you can skip Management, advance and tags. That’s not mandatory for all type of VM’s and click create once you reviewed all information.

Create using PowerShell
In powershell we can use more parameters to create virtual machine but in this article i used some basic parameters to create virtual machine like name, image, location and resource group name.
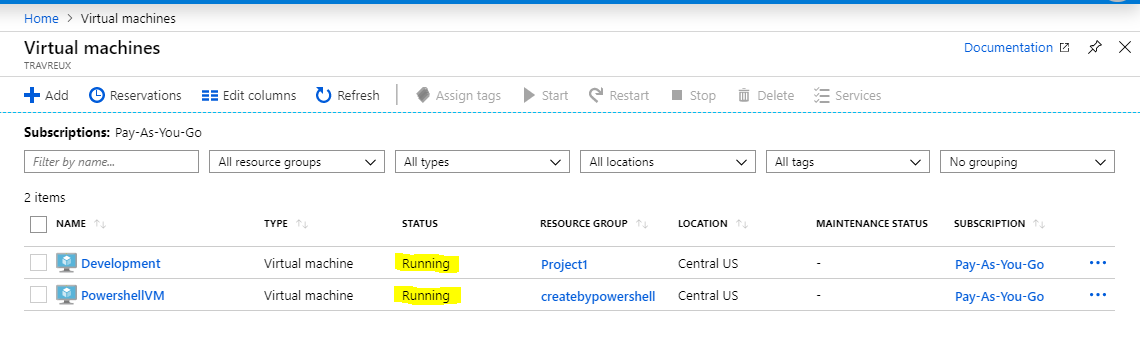
New-AzureRmVM -ResourceGroupName "createbypowershell" -Location ' Central US' -Name "PowershellVM" -Image Win2012R2Datacenter -OpenPorts 80,3389
Connect virtual machine
Once you see your virtual machine status as running then you are good to connect your virtual machine. so to connect click your respective virtual machine and click connect from top which is highlighted in below image and you can see Download RDP File button on your right windows.

Once you downloaded and open that RDP file, it will prompt you to enter username and password, you can enter the credentials what you given while creating virtual machine.

at last, your virtual machine is ready to use.

Important Hints
- Port number 3389 should be enabled, otherwise RDP will not be work in your VM
- All capacity will not have for all location, so you should be aware while selecting the location
- Managed virtual machine would not have any extended drive, it will create OS drive along with temporary drive. then you can add another drive even after created virtual machine
- You can download a Template for automating the virtual machine creation with same configurations